
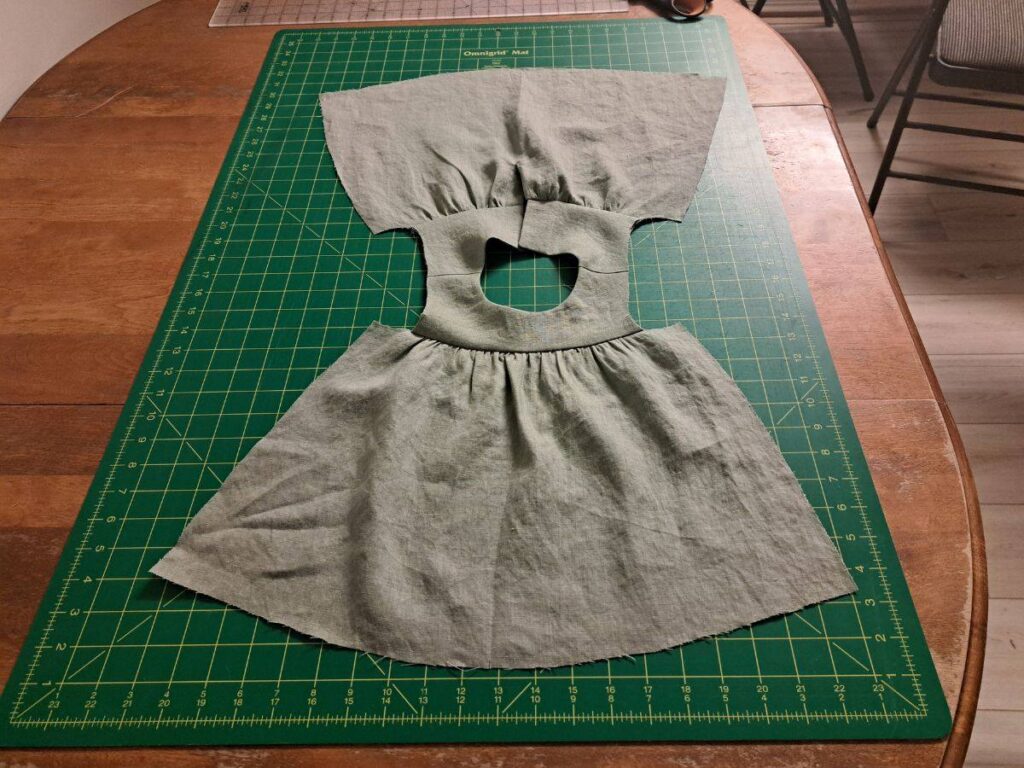
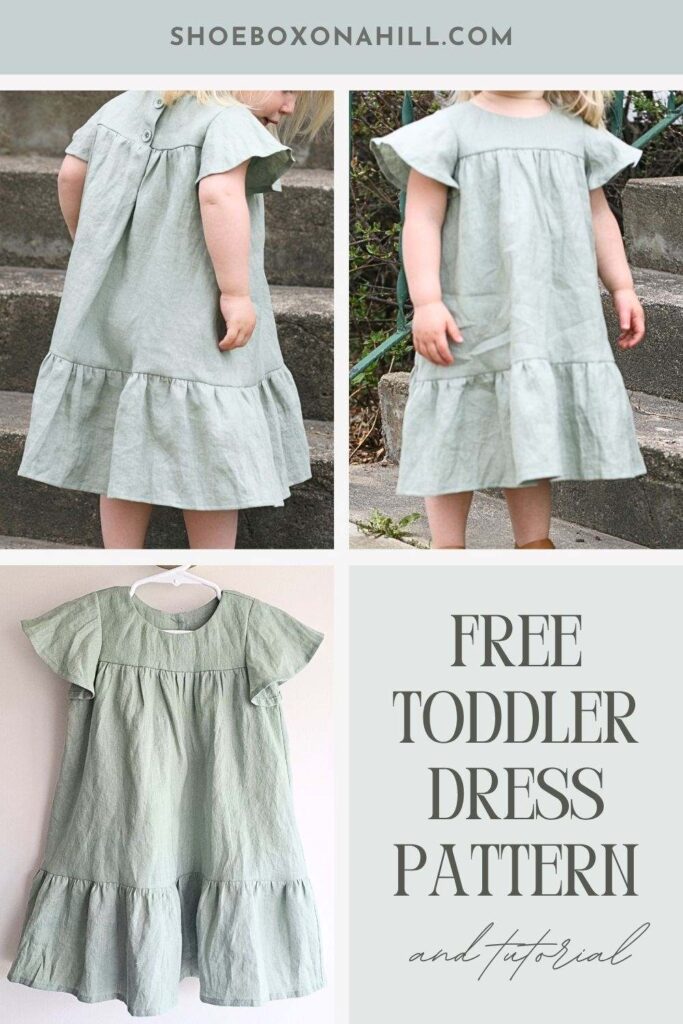
Join me today as I sew this classic high-yoke toddler dress. I’m including step-by-step instructions and a free PDF download for sizes 2T, 3T, and 4T. This summery dress features half-circle butterfly sleeves, a button placket on the back, and a ruffle on the hem. It can be sewn with a woven fabric like linen, quilting cotton, poplin, old sheets, etc.
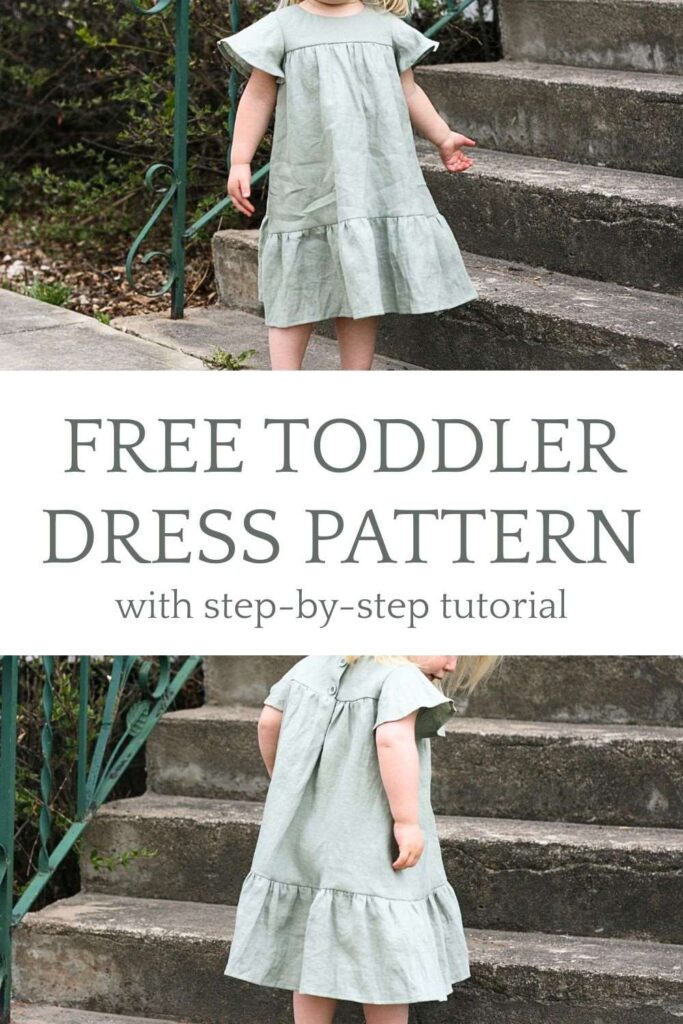
I absolutely fell in love with this style when my daughters were gifted these similar knit dresses a couple years ago. There’s just something so nostalgic about this look!

I really struggled to find a name for this pattern/tutorial though. I want to call it a nighty dress, but that doesn’t seem to be what people call it. I also searched and found baby doll, but those are usually really short. Well anyway, I decided to go with the very accurate (but not so catchy) name of high-yoke toddler dress. What would you call this style?
I will admit, I would still love to tweak this dress a little to get a slightly slimmer fit like the knit ones… But time is limited, so I’m leaving this pattern as is and will hopefully work on something for the fall with long sleeves. So stay tuned!
Supplies and Materials
- Sewing machine with zig zag stitch
- Basic sewing supplies
- Serger (optional)
- Woven fabric such as quilting cotton, linen, old sheet, etc (1.5 yards of 45-inch wide fabric will be enough for all sizes))
- Fusible interfacing (I use this)
- Two buttons (I used 5/8 inch, but anything close to that will work)
Prepare your fabric
Wash, dry, and iron. Always prepare your fabric in the same way that the finished garment will be laundered. This prevents shrinkage on your final product!
Download and prepare the paper pattern
Download the free toddler dress pattern below, then print, tape and cut it out. I’ve included a cut chart with the measurements of the rectangular pieces, which are the placket and the bottom ruffle. If you don’t want to print the bottom ruffle pattern piece, only print pages 1-6.
Cut out the pattern pieces and notch
Cut everything out, making sure to notch the front bodice waist in the center, as well as the centers of the skirt pieces on the waist and bottom. Also notch the centers of the ruffle pieces on the top.
Notch the arm openings where indicated, as well as the sleeves where indicated and at the center top (between the other 2 notches).
Cut out 2 strips of interfacing 1 inch wide and 1/2-inch shorter than center back.
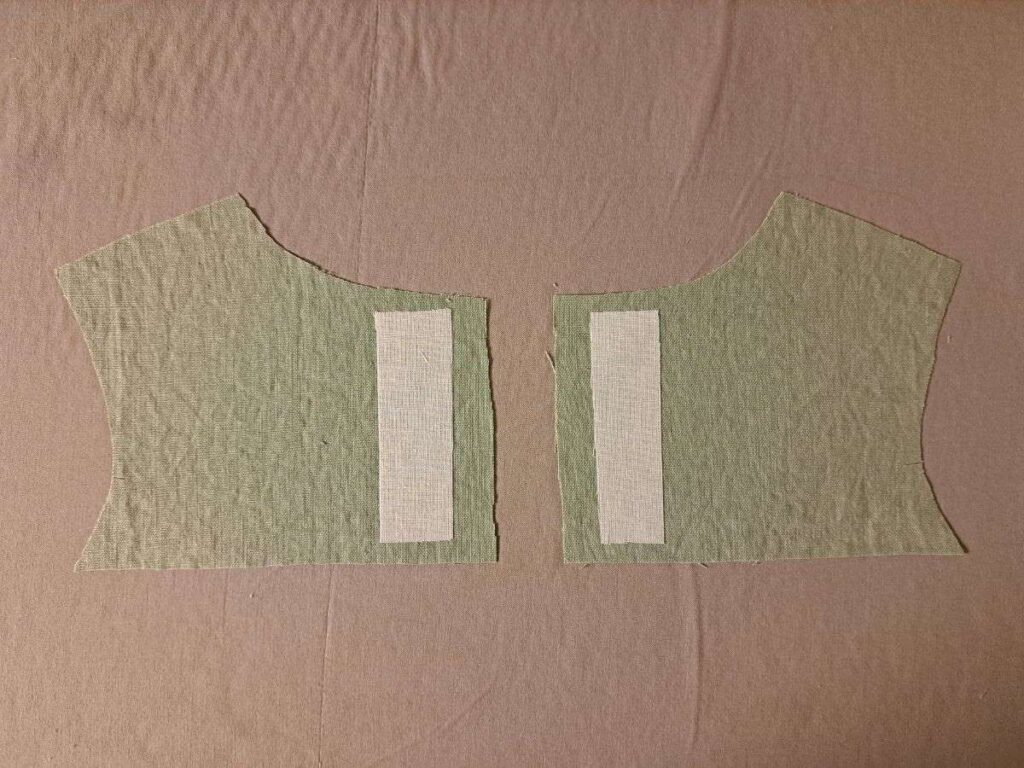
Iron interfacing on to back bodice pieces
Iron the interfacing onto the wrong side of one set of the back bodice pieces, 1/2-inch from the edges.
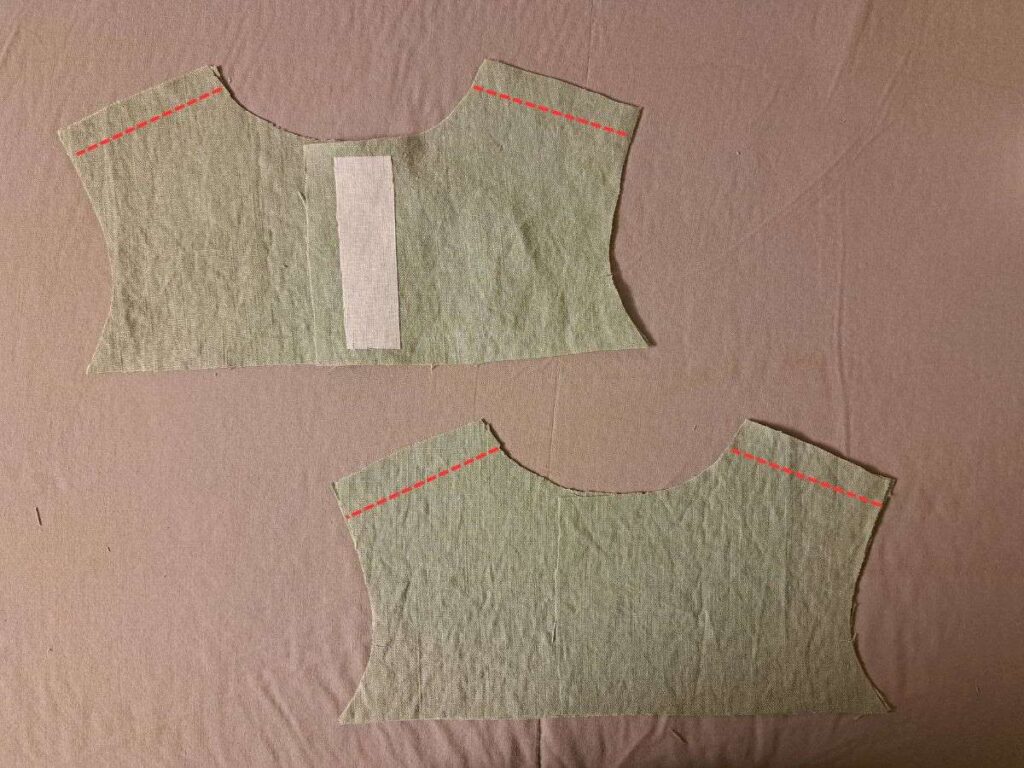
Sew back bodice pieces to front bodice at the shoulders
Lay the bodice right side up, and the bodice back pieces on top, right sides together. Sew the shoulders together with a 1/2-inch seam allowance. Then trim the seam allowances to 1/4-inch and iron them to either the front or back.
Repeat on the other set. Iron the seams the opposite way that you did on the first set. The set with the interfacing will be your main bodice and the other set will be the bodice lining.
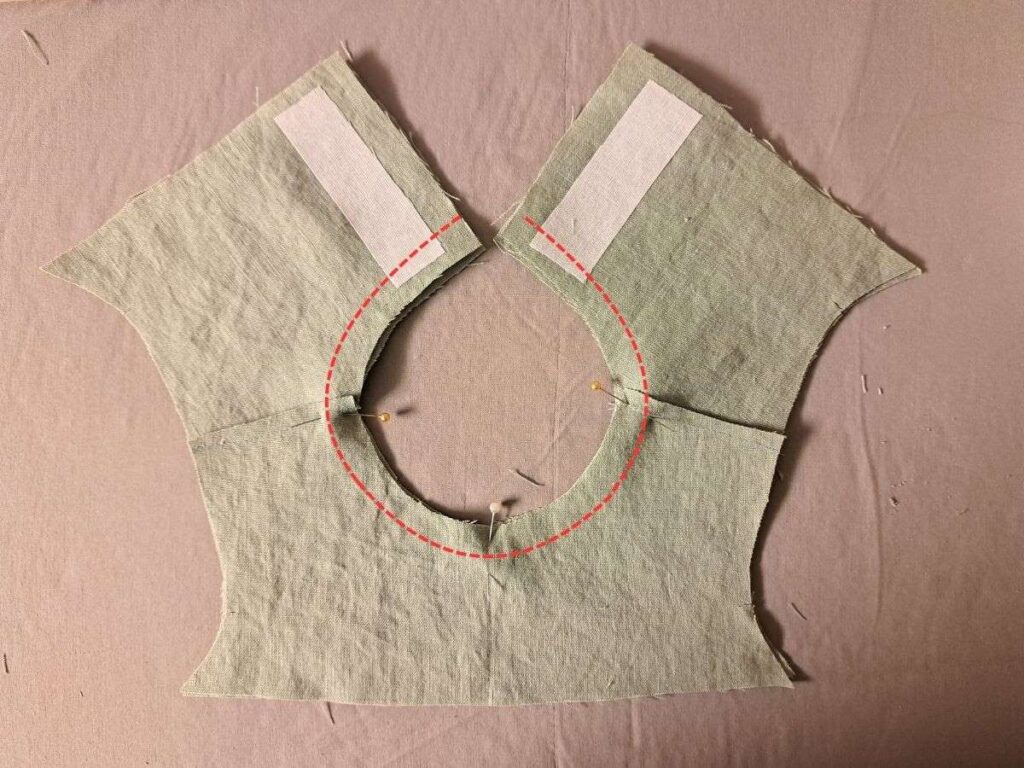
Sew main bodice and bodice lining together along neckline
Lay the bodice lining right side up and lay the main bodice on top, right sides together. Pin along the neckline, taking care to line up the shoulders perfectly. Sew in place with a 1/2-inch seam allowance.
Trim the seam allowances and clip curves
Trim the seam that you just sewed to 1/4-inch, then clip the curves, like in the picture below (of a different bodice). The clips should be just inside the stitching line, about 1 inch apart all along the curve of the neck.

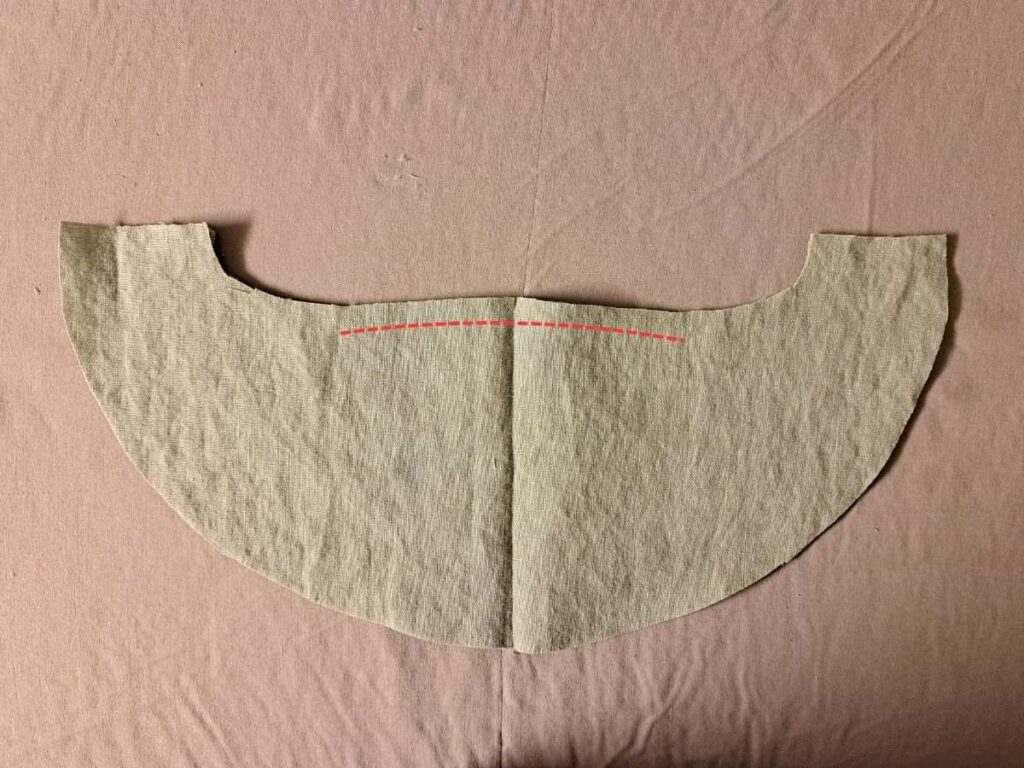
Understitch the neckline
Understitch the seam allowance to the lining, starting and stopping 3/4-inch from the edge. If you don’t know how to do an understitch, then check out this tutorial.
Here you can see the trimmed and clipped seam allowance, as well as the line of understitching that started about 3/4 inches from the edge.

Sew back placket
Sew the main and lining pieces together along the button placket. Then trim the seam allowances to 1/4-inch and clip the corners to reduce bulk.
Iron bodice and trim excess
Now turn the bodice right side out and iron it nicely, making sure you don’t see any seams from the front. Because of the way the understitching pushes the fabric, there will most likely be a tiny bit of excess lining fabric along the raw edges. Just trim this away.
Baste bodices together along waistline
Baste (just sew, but you don’t need to worry about backstitching, because it’s just to hold things in place for now) 1/4 inch from the edges in the following places:
Sew placket into the back skirt piece
We are going to sew a placket into the back of the skirt. If you’ve never sewed a placket to a skirt, then I recommend checking out this tutorial for detailed instructions.
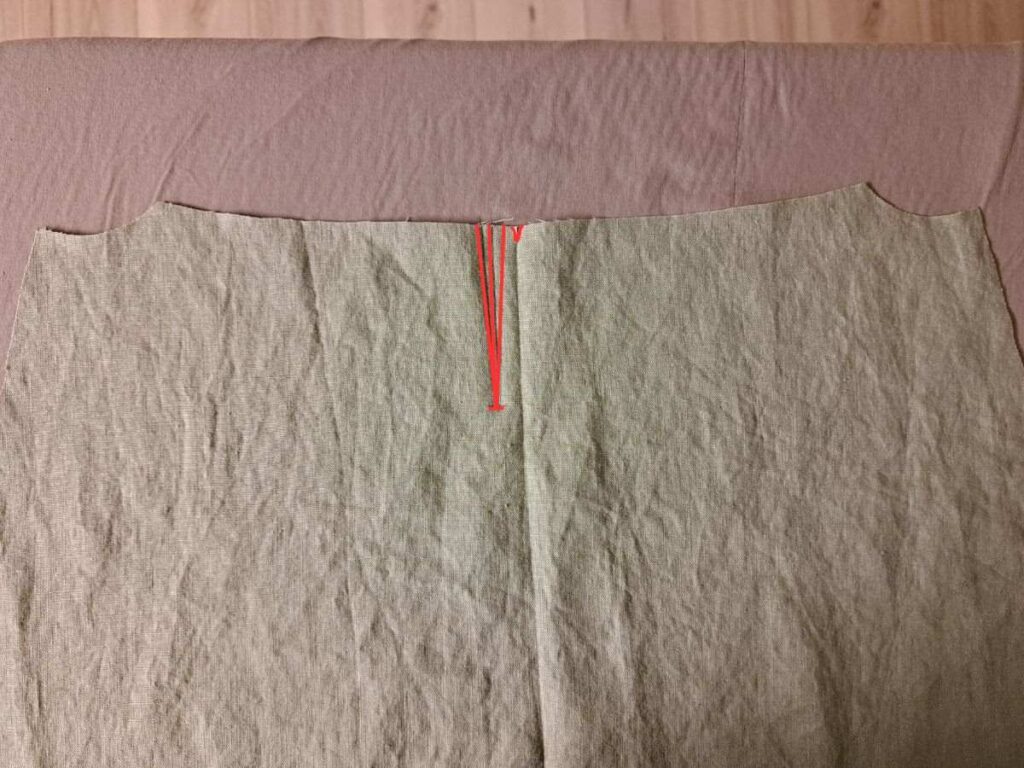
Usually I sew my placket right in the center of the skirt, but technically that’s not the absolute best practice. That’s because once the placket is actually added, the opening will not be quite centered. Usually it’s not noticeable, but because this is a lightly gathered skirt, it will be noticeable.
So you need to mark your placket on the wrong side of the fabric, 3/8 inch to the left of the center. Then you can add your diagonal lines and proceed as normal. Make sure to reread that if you need to!
If you find yourself thinking that doesn’t make sense and it’s going to make it even more uneven, please just trust the process! That’s what I thought and I had to waste a whole skirt piece figuring out it needed to be this way 😛
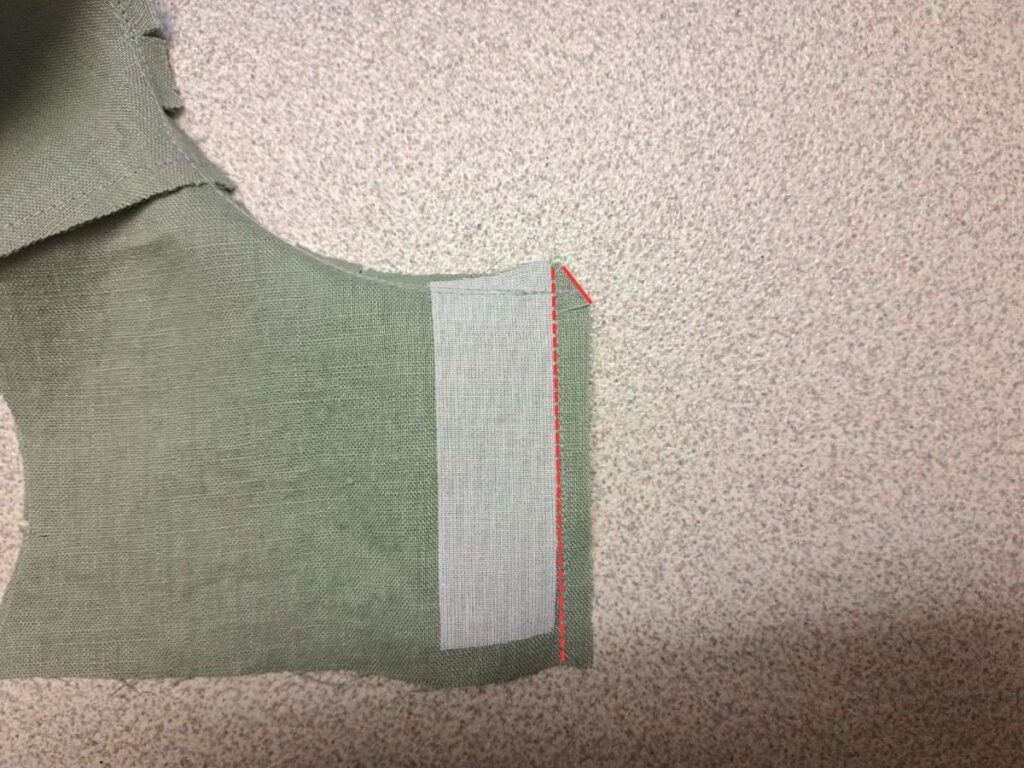
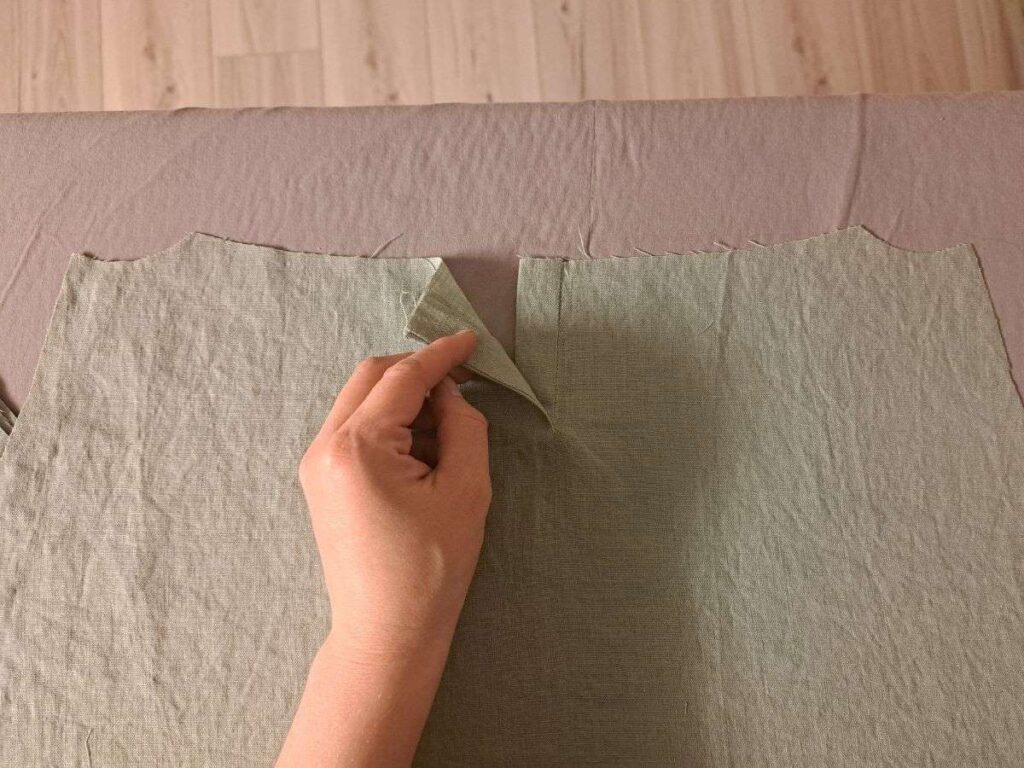
Make sure to leave the placket unfolded (don’t baste in place), as we want it to be able to wrap around the bodice in a later step for a nice clean finish.
Below is the finished placket from the right side (note that the folded edge that I’m holding isn’t basted in place).
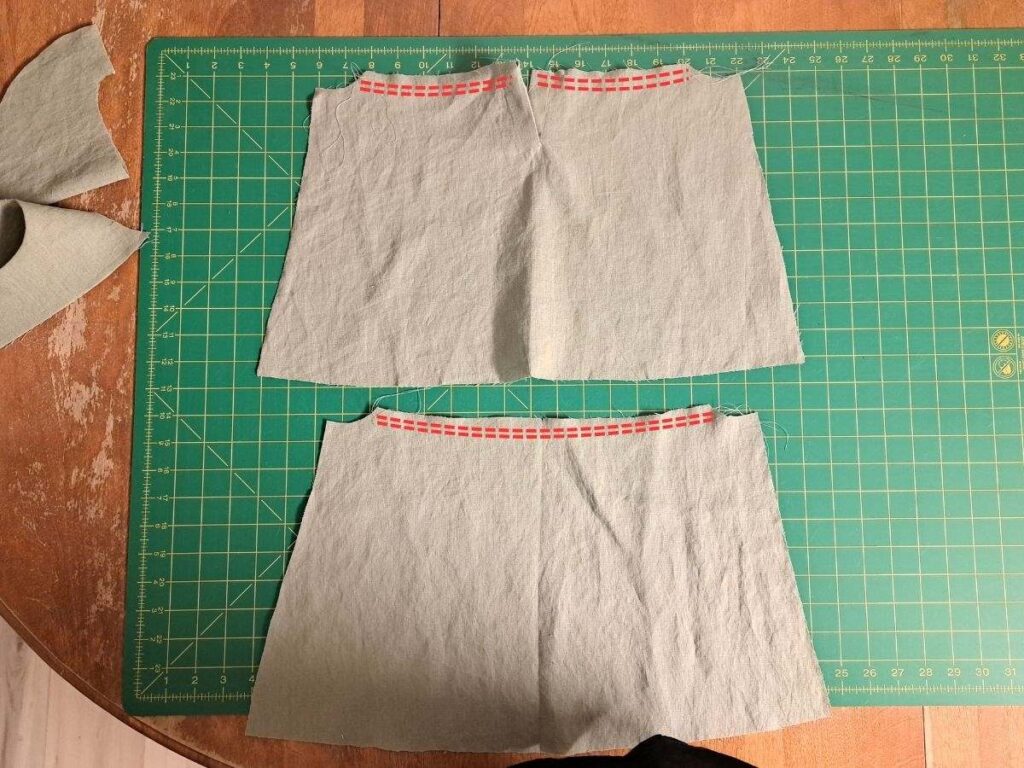
Sew gathering stitches along waistline of skirt pieces
If you have never sewn gathers, you can check out my full tutorial on gathering here.
Sew two lines of gathering stitches (longest straight stitch, needle tension low, no backstitching), 3/8 and 5/8-inch from the top edges.
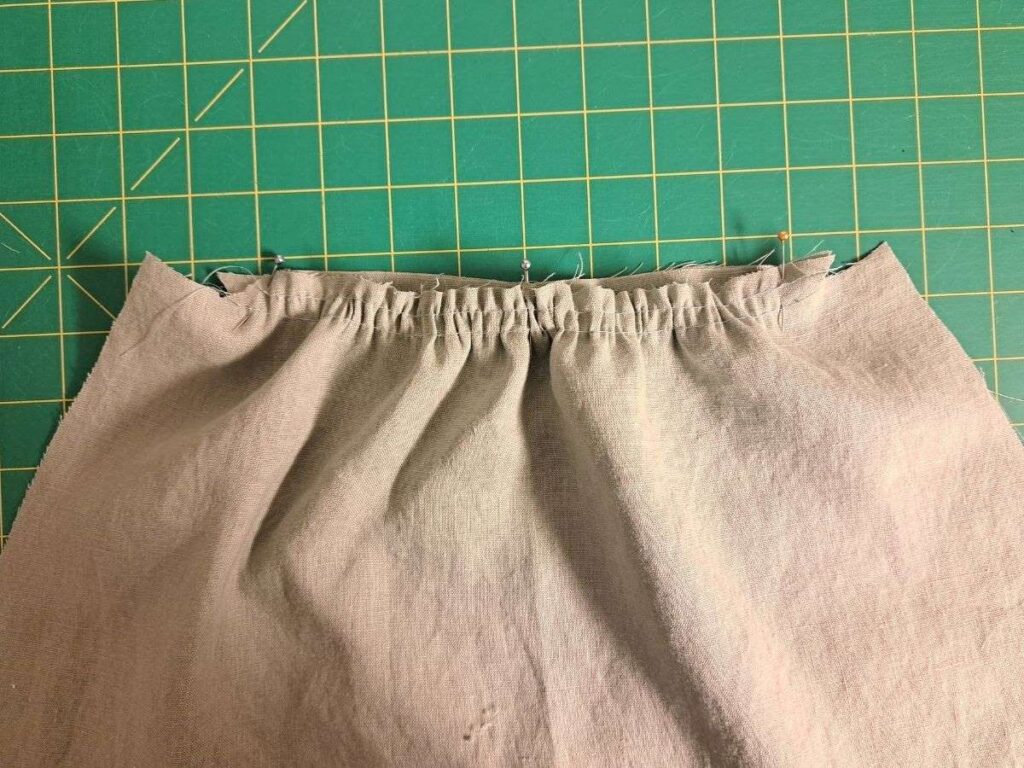
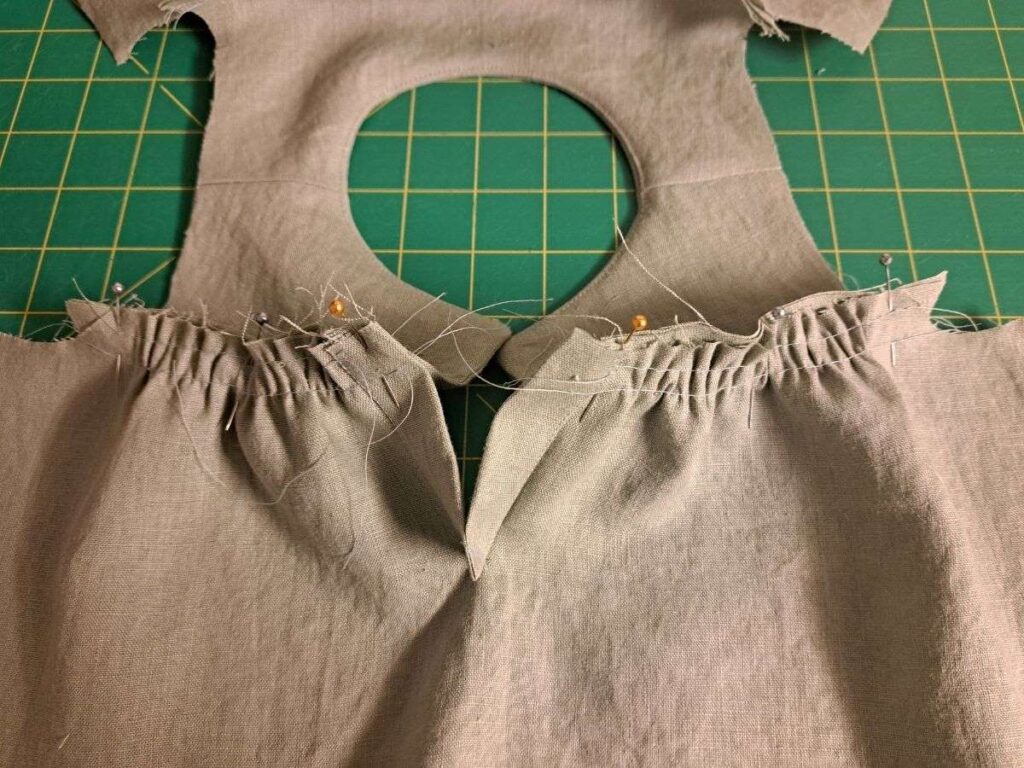
Pin skirt pieces to bodice
Line up the notches on the waists and tops of the skirt pieces, with raw edges all aligned. Pull on the bobbin tails of the gathering stitches to gather the skirts to the size of the bodices. Use several pins to keep everything in place.
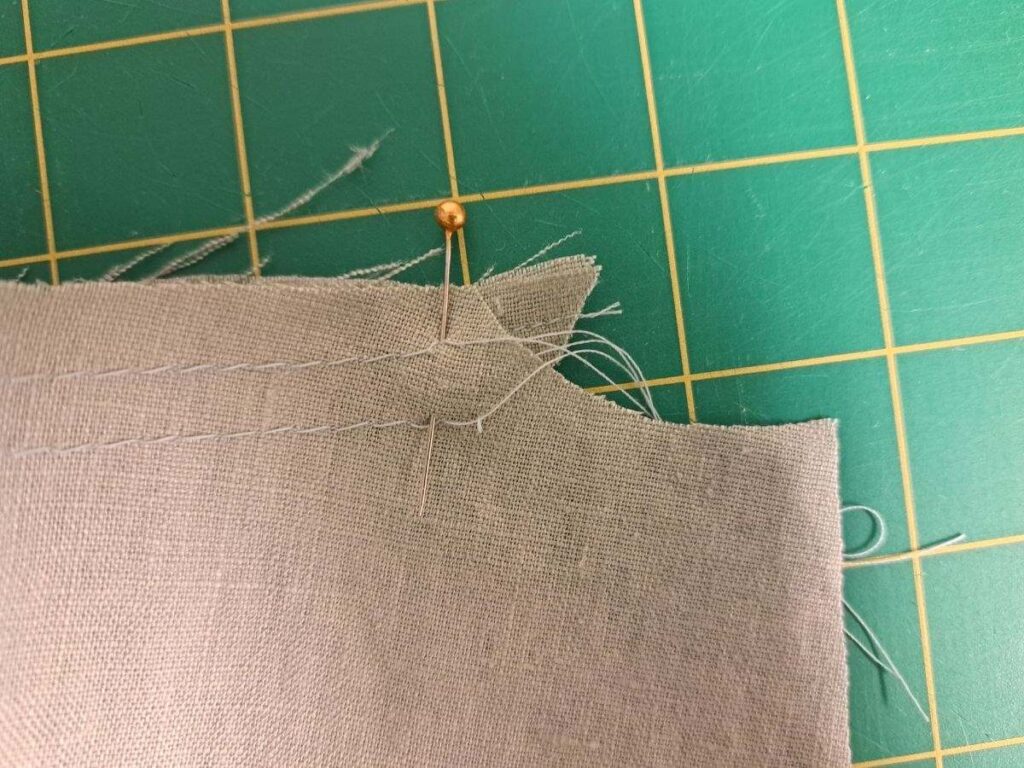
Because of the different curves of the seam allowances, it will look like the skirt and bodice pieces don’t want to line up. What’s important is that they line up at the stitching line (1/2 inch from the edge). So they should look like this picture:
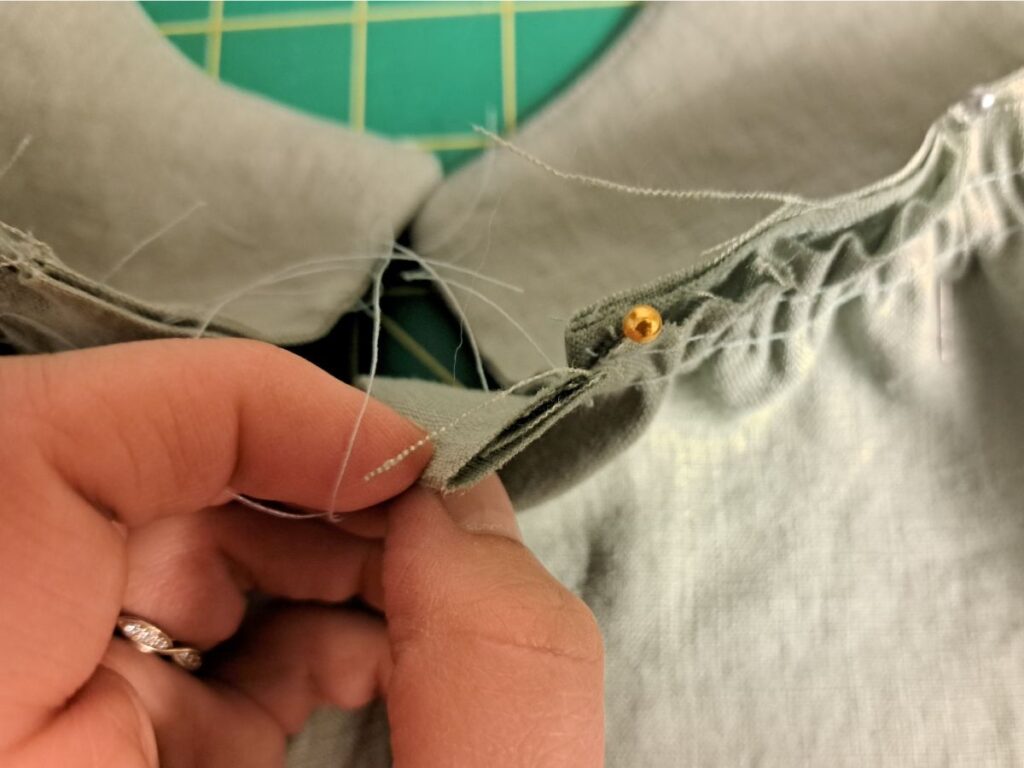
On the back bodice, make sure to let the unbasted placket extend past the waist edge, like in the two pictures below.
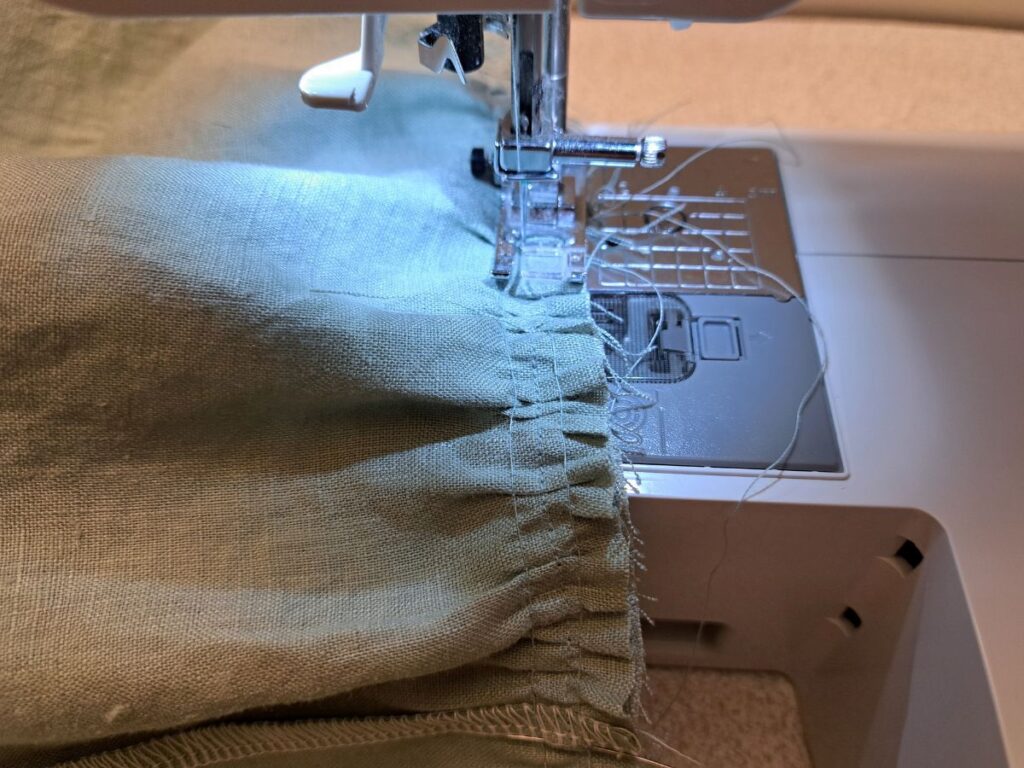
Sew skirt pieces to bodice
Then sew the skirts in place with a 1/2-inch seam allowance.
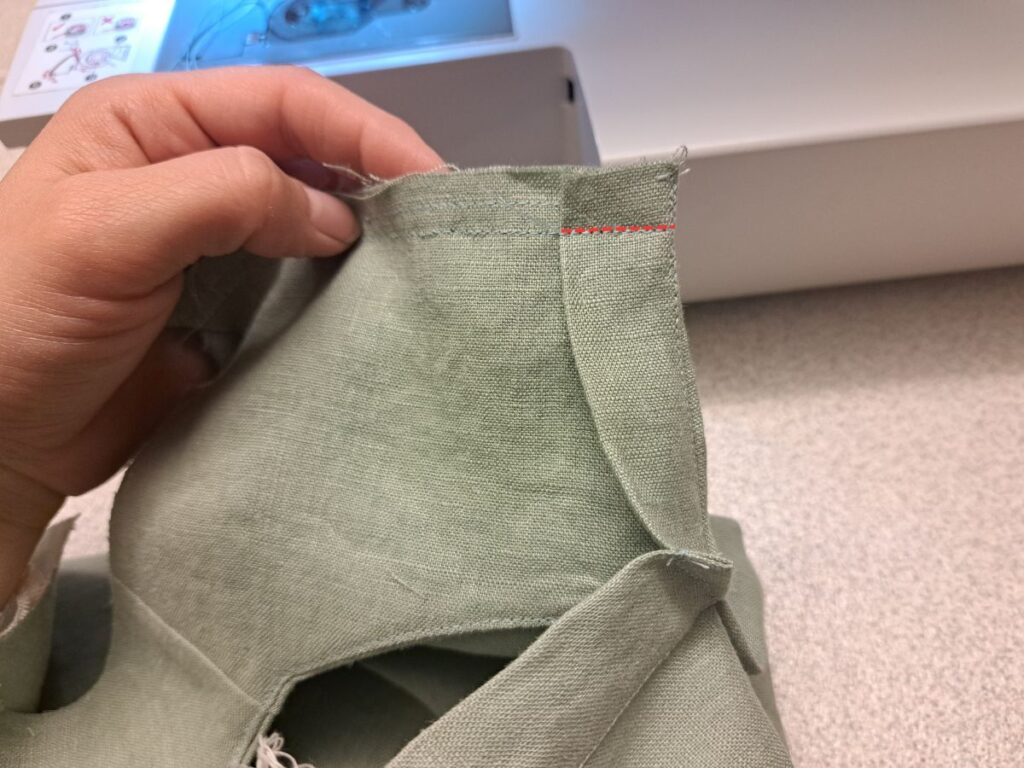
Then fold the placket over to the wrong side of the bodice and sew it in place, as indicated below:
Then remove the gathering stitches (this should only take a few seconds, please check out the full tutorial on gathering here if you’re spending way too long removing gathering stitches!).
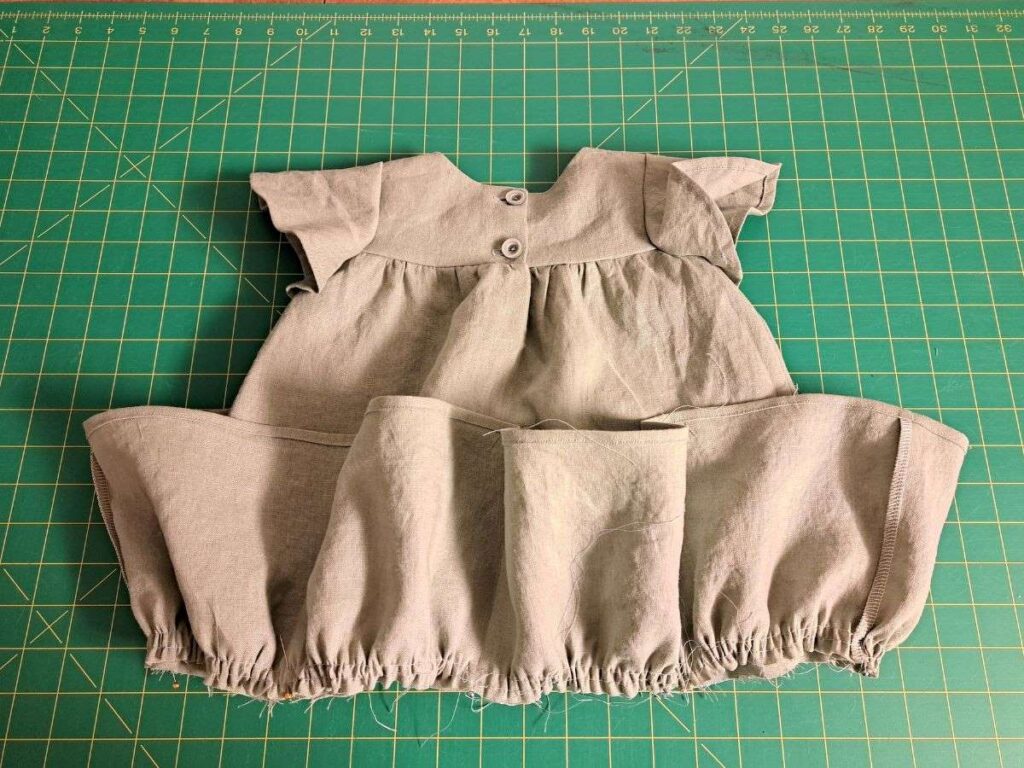
Finish the raw edges with a serger or zig-zag stitch. This is what it will look like at this point:
Mark buttonholes and sew
If you don’t know how to sew buttonholes, you can check out this tutorial here.
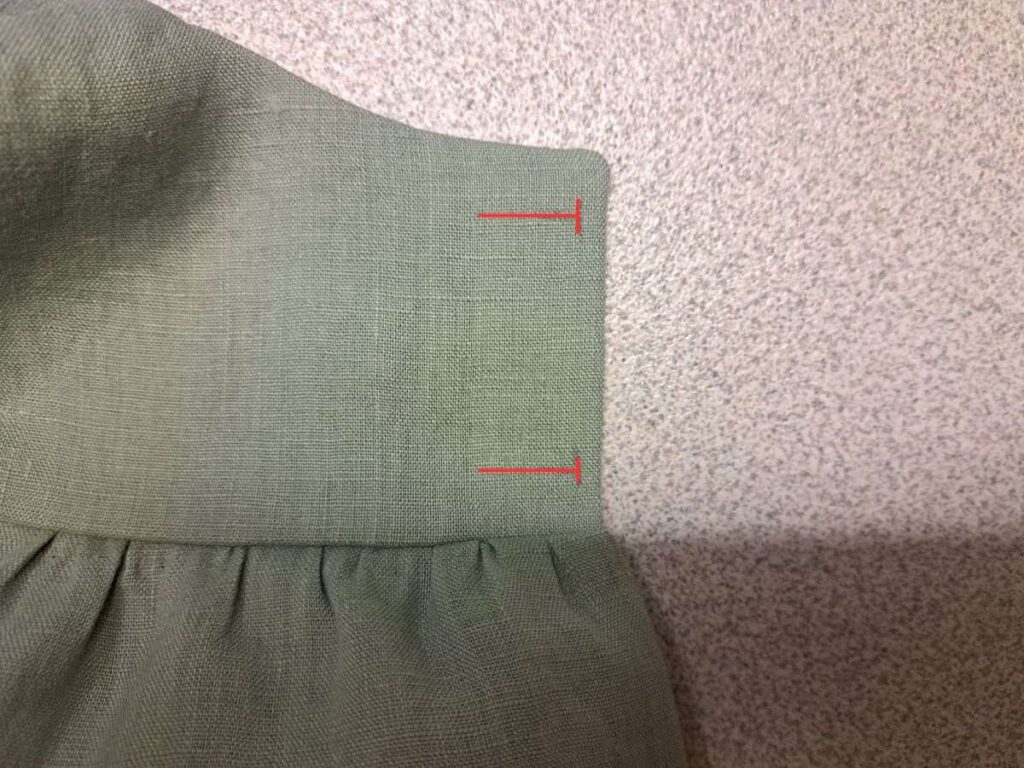
I’ve really been loving horizontal buttonholes lately. So if you want to do them this way, then mark them a scant 1/4 inch from the placket edge, and 1/2 inch from the top and bottom, as indicated in this picture:
Otherwise you can simply do them vertically, 3/8 inch from the placket edge and about 3/8 inch from the top and bottom.
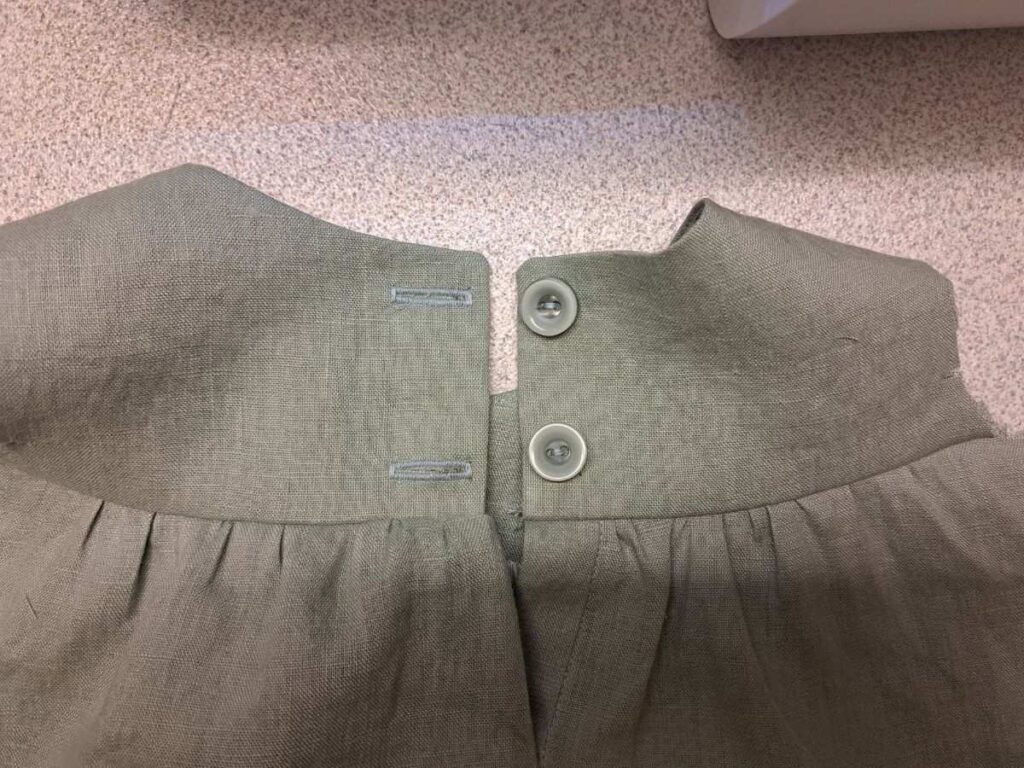
Mark and sew buttons on
If you don’t know how to sew buttons, you can check out this tutorial here.
Mark them 3/8 inch from the placket edge and 1/2 inch from the top and bottom, then sew in place.
Sew side seams of skirt
Simply lay the skirt pieces right sides together and sew the seams with a 1/2-inch seam allowance, then finish with a serger or zigzag stitch.

Sew ease stitches on sleeve caps
Here you are going to do an ease stitch. It’s like a gathering stitch, but it’s only meant to ease in a tiny bit of excess fabric. There will be no visible gathers once the sleeves are finished. This is common on sleeve caps to give a little more ease for all the motion that happens around the shoulder.
So, using the longest straight stitch and no backstitch, sew one line of stitching between the two notches, 5/8 inch from the edge.
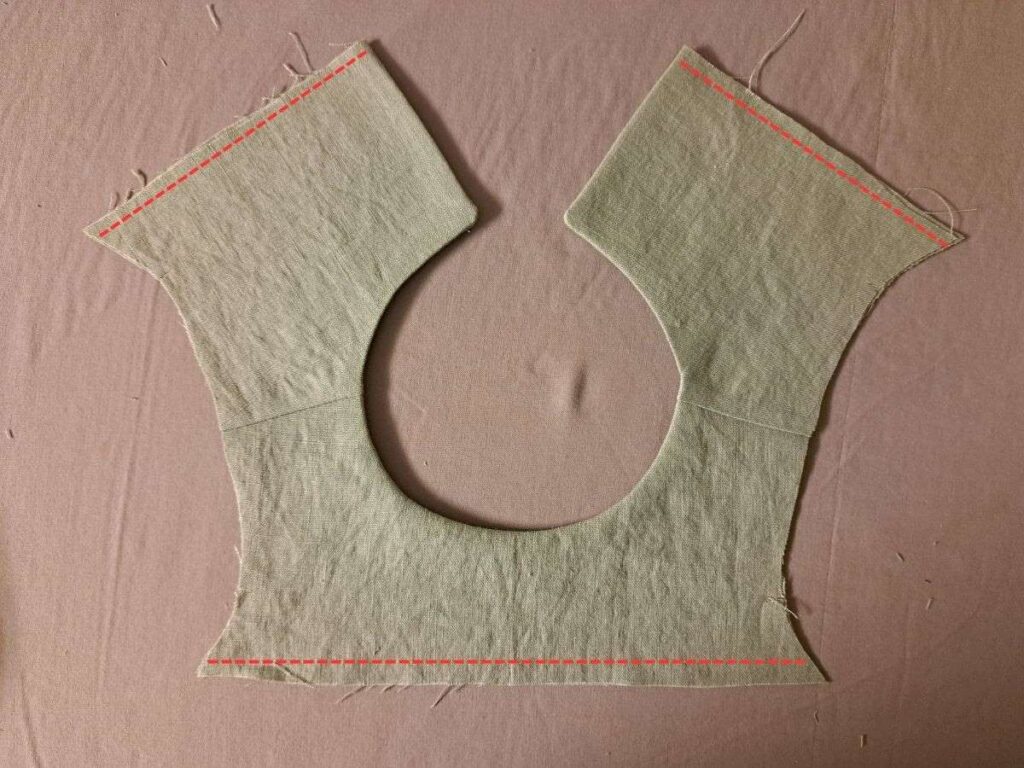
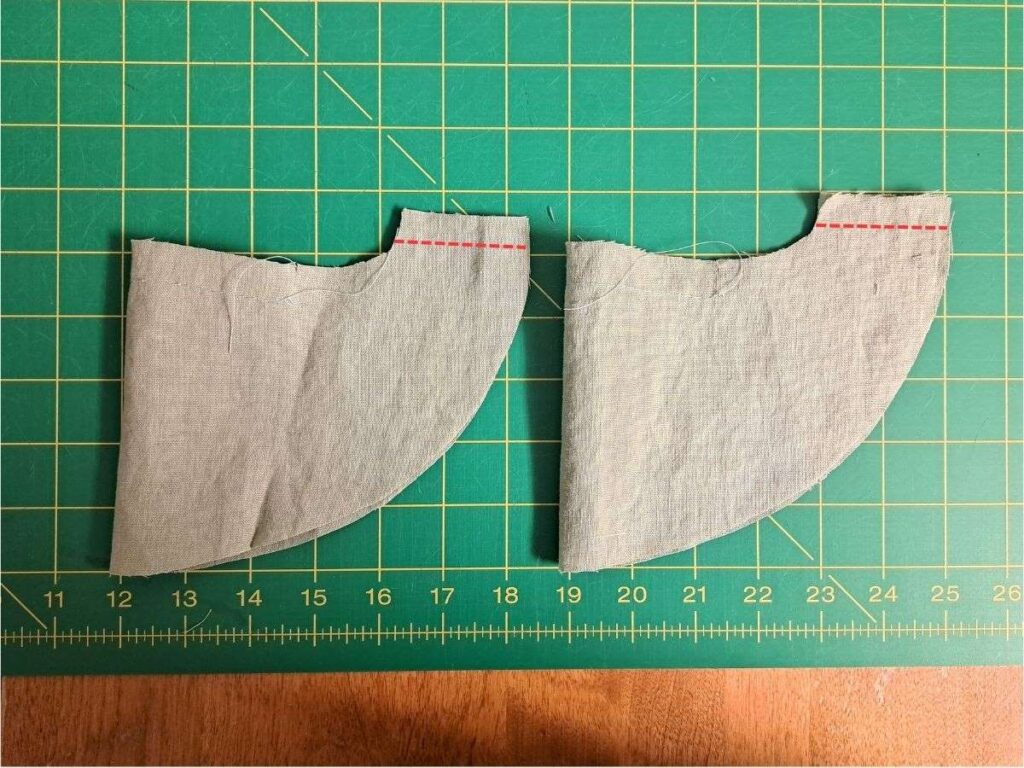
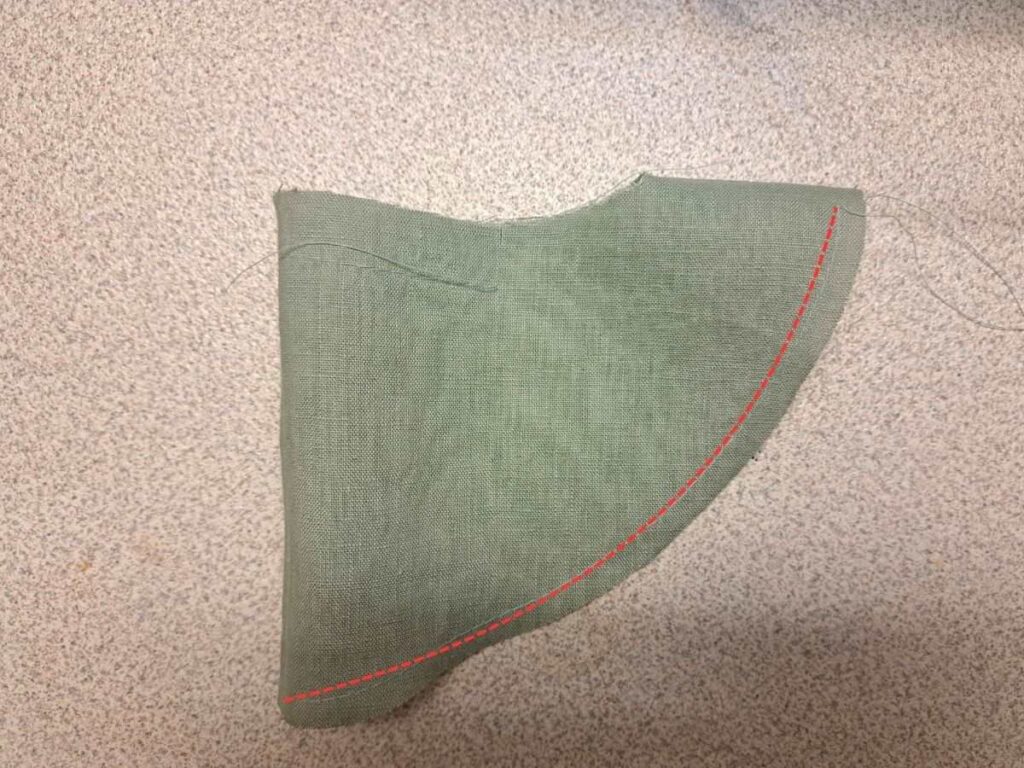
Sew side seams of sleeves
Sew the side seams with a 1/2 inch seam allowance where indicated, then finish the seams with a serger or zig-zag stitch.
Hem sleeves
The next few steps will show you how to hem the curved sleeves. If you’ve never done this, you might want to check out this tutorial on sewing curved hems for more details.
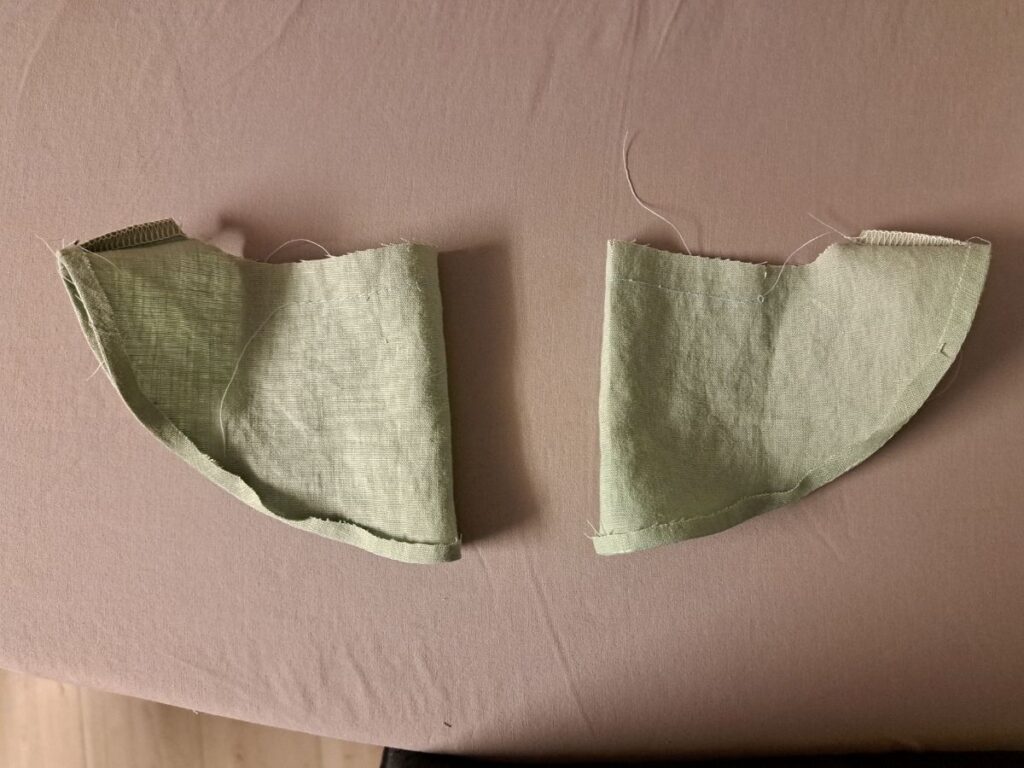
Sew ease stitches on sleeve hems
Sew an ease stitch all around the hem of the sleeve, 1/4 inch from the edge. Start at one seam and go all the way around (you don’t have to get right to the seam). Like the sleeve cap, use the longest straight stitch and no backstitch.
Fold and iron sleeve hems
Fold the hems to the wrong side by 1/4 inch, using the ease stitch line as a guide, and ironing as you go.
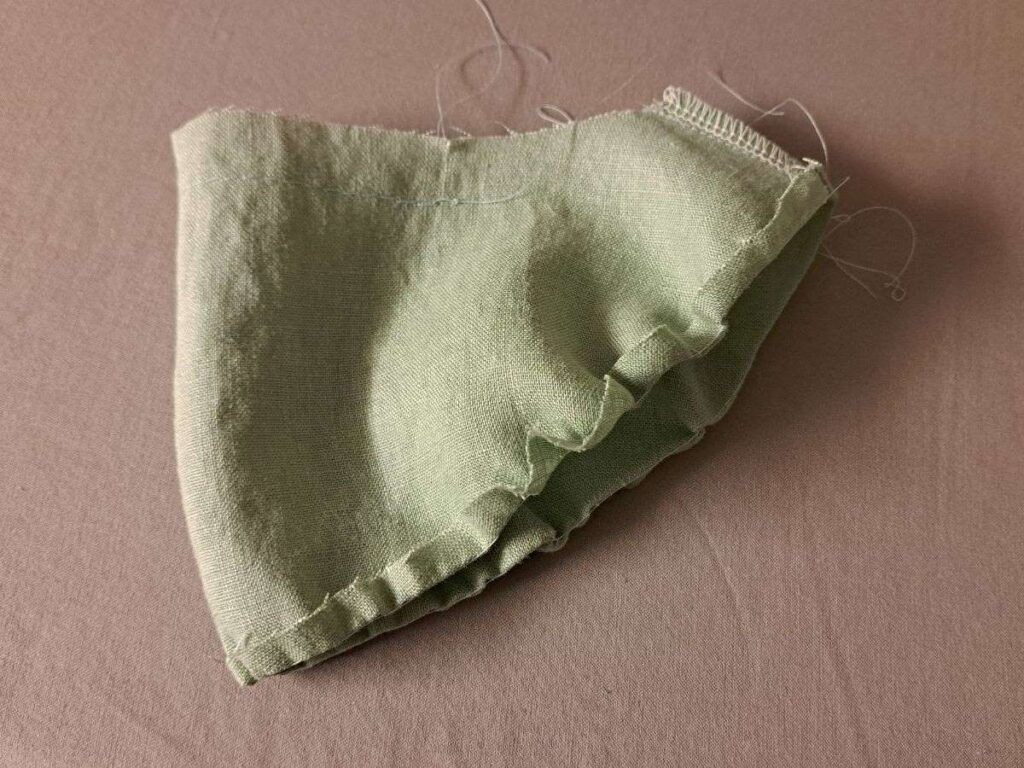
Ease the curved hems of the sleeves
Then pull on the tails of your ease stitches to gather the fabric slightly. I like to gather it a little more than needed, then work out the extra gathers in the next step.
Fold, iron, and pin sleeve hems
Then, starting at the center of the section, fold in by another 1/4 inch, iron, and pin all around. Adjust the fabric as you go, so that it’s not too gathered.
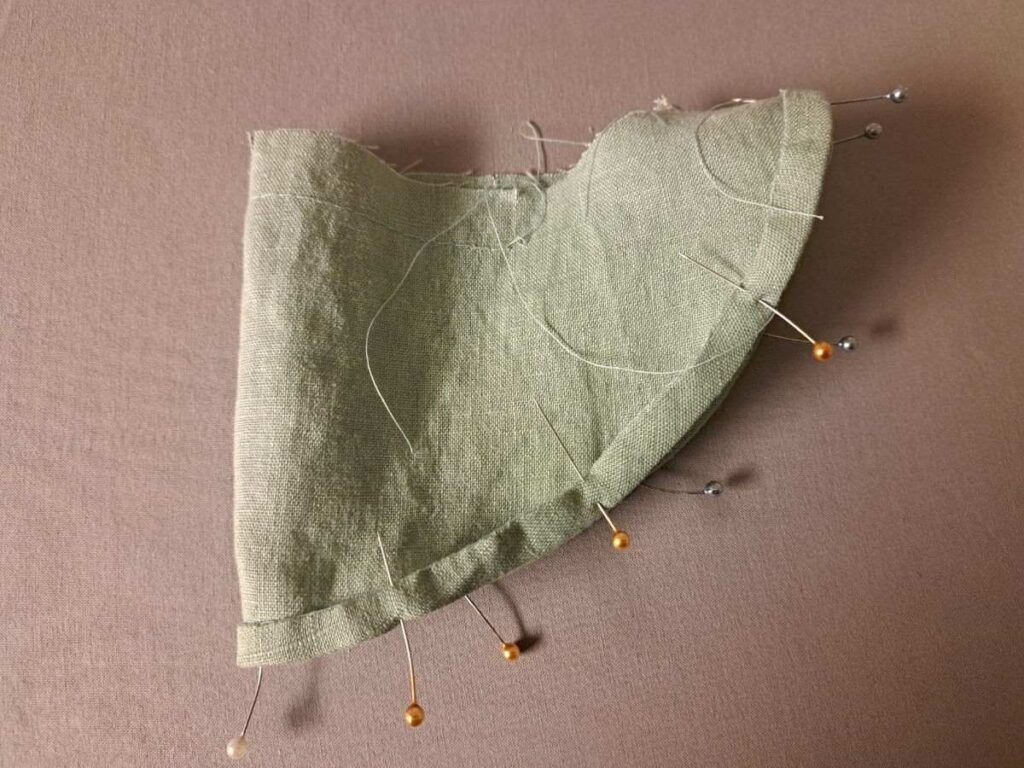
Edge stitch the sleeve hems
Then edge stitch the hem in place, removing the pins as you go. Give it a final iron.
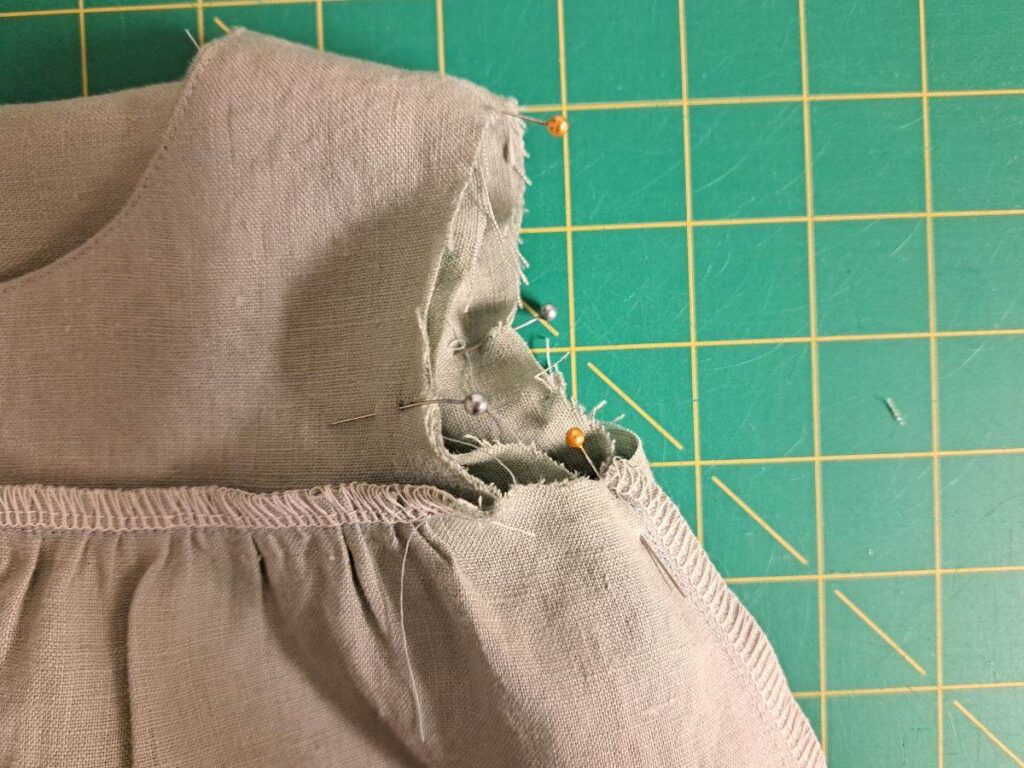
Pin sleeves to dress
With the dress inside out and the sleeve right side out, slide the sleeve inside the dress so that the raw edges meet.
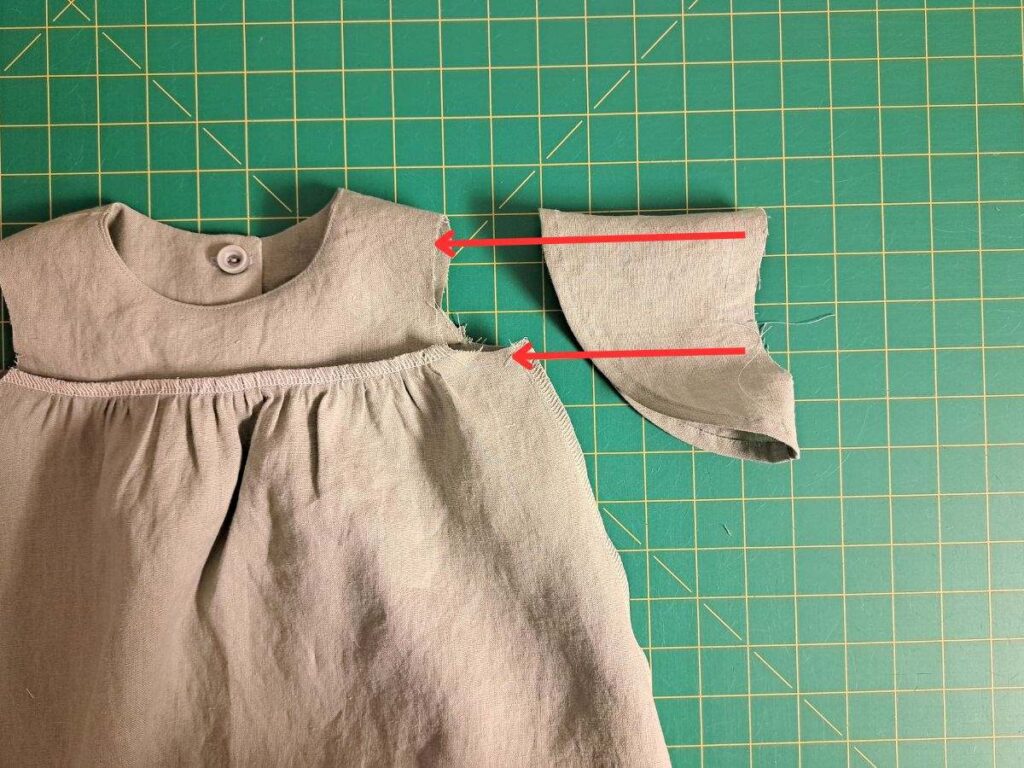
Line everything up with the notches and seams and place pins all around. Pull on the ease stitches that you sewed on the sleeve cap to ease the extra fabric in (again, there should be no visible gathers).
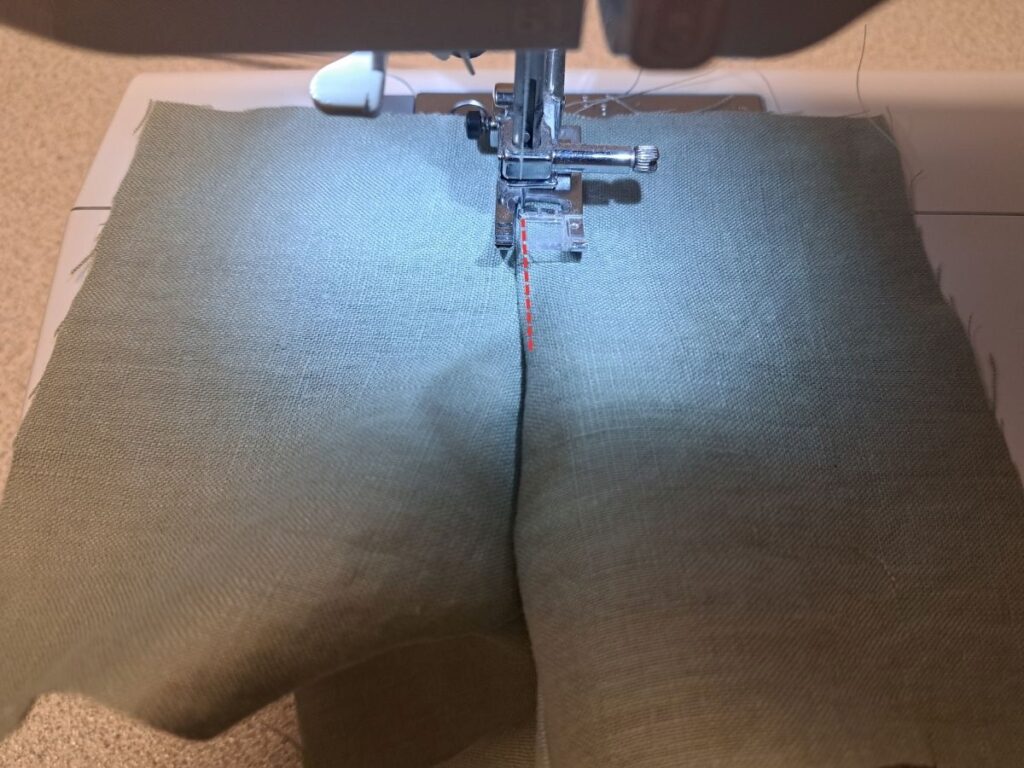
Sew sleeves to dress
Then sew it all together. I know, this part isn’t very fun. Place the dress at the sewing machine like in the picture below. Then really take your time, feeling underneath as you go to make sure that the raw edges stay lined up and that there are no folds or gathers.
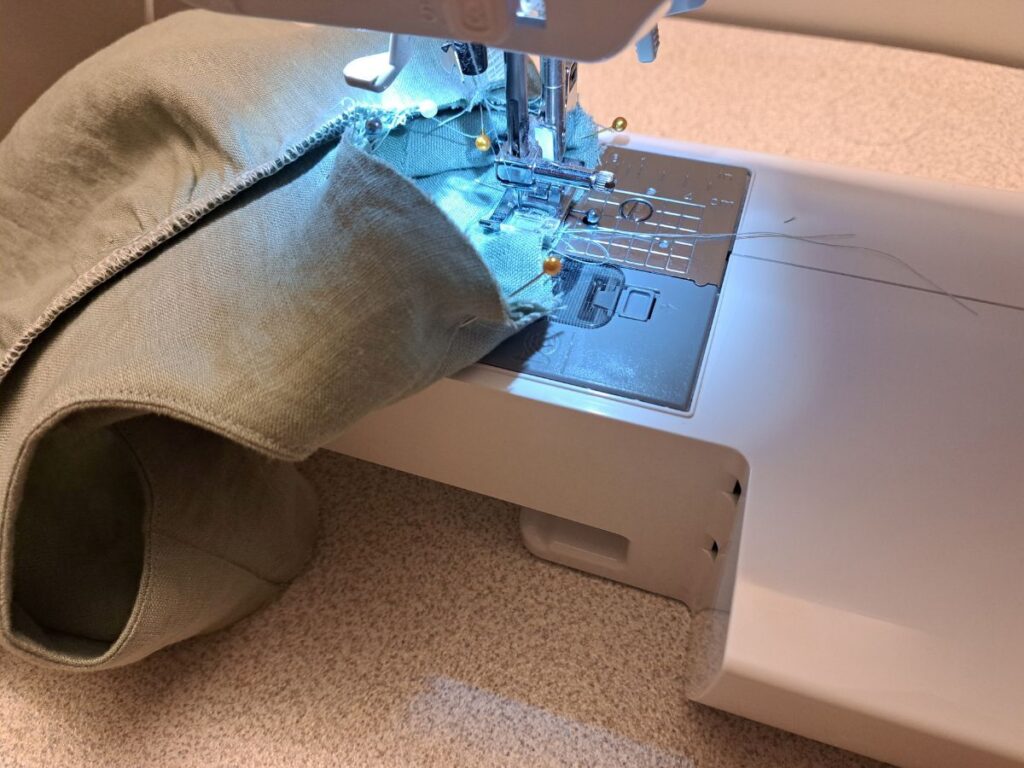
Then finish the seam with a serger or zig-zag stitch. I have a serger but I used my sewing machine for this part because I didn’t think the awkwardness of this small opening and the knife of my serger would be a good match.
Sew side seams of ruffle
No picture here, but simply lay the two ruffle pieces right sides together and sew along the sides with a 1/2 inch seam allowance, then finish the seams.
Hem ruffle
No picture here either! Ok so I actually almost always hem my skirts or ruffles before attaching them to the rest of the dress because it’s just less to deal with. Simply fold in by 1/4 inch twice and iron in place, then edge stitch.
You can of course do this step last, especially if you think you might want to adjust the length.
Sew gathering stitches on ruffle
Sew two rows of gathering stitches 3/8 and 5/8 inch from the top edge of the ruffle (needle tension low, longest straight stitch, no back stitching).
Attach ruffle to skirt
Now you can attach the ruffle to the skirt, right sides together. Match up notches and side seams and use plenty of pins to keep everything in place.
Sew in place, remove the gathering stitches, and finish the raw edges with a serger or zig zag stitch.
All done!
That’s it! I hope you enjoyed following along for this free toddler dress pattern, and that you’ll give it a try. Please let me know if you have any questions about the process or issues with the pattern. I’m very much still learning to make and grade patterns, so all feedback is appreciated!
Hi! Do you have any sizeshart for the dress?
Hi Lena, I do not have size charts yet! I am slowly working on getting that all official and added to my website. – Gloria
Hi again! Does the pattern include seam allowance? Or should I add that myself?
Hi Lena, I’m sorry for the late reply! I hope you were able to figure it out already, but yes the pattern does include a seam allowance. -Gloria
Hello there,
I really love this pattern, thanks so much for the freebie!
I can’t wait to try it for my little grand daughter 🙂
I’m having issues with the scaling. When I go to print it out, the size comes up as 18mm x 25mm!! So, I have enlarged the pattern “to fit the printable area” in the print profile. It comes out the incorrect size, just by 3/16th of an inch, but not the correct size. How can I fix this issue? Or, do I just go down a size…eg a size 3 to fit a 4yr old?
I’m not super confident with computers, sorry. Thanks so much for your reply & help. Kindest regards.
Hi Taryn, you’re welcome 🙂 Sorry you’re having trouble and that I’m just getting to your comment, I’ve been so busy with non-blog things this summer! If you’re opening the pattern in your browser, that usually causes problems. Make sure to download it, then go to the downloads on your desktop and open the pattern with Adobe Reader. Then make sure it’s at 100% scale and it should work. Please let me know if it doesn’t! -Gloria
What settings am I supposed to use for printing the pattern? No matter what I tried the test square is always bigger than 1 “.
Hi Sharon, make sure to download the pattern, then go to your downloads and open it in Adobe Reader. If you just open it in your browser, it will most likely not print at the right scale. I hope that works, but let me know if it doesn’t! -Gloria