
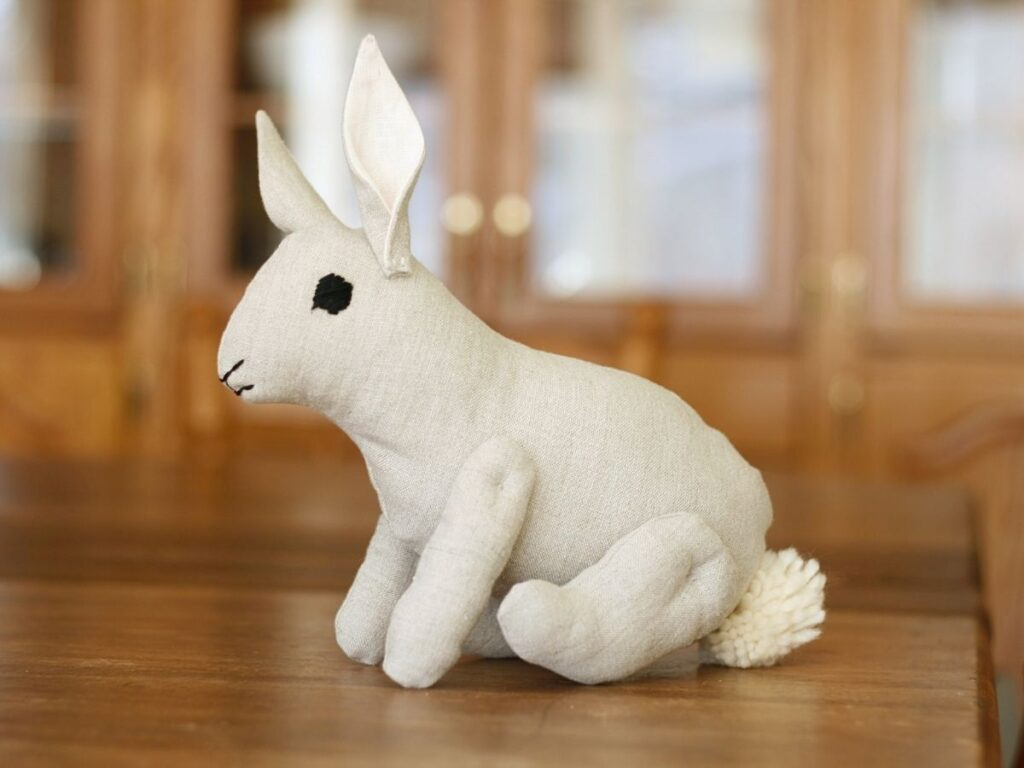
Have you ever made a stuffed toy? Well, today I have a pdf pattern to make an adorable stuffed bunny! This stuffed bunny is simple and fun to make and it’s also a great way to use up fabric scraps. It’s a great idea for a gift for a little girl or boy, especially if you want to have more control of the materials that your kids’ toys are made from.
About This Stuffed Bunny
In this tutorial, I will share a free PDF pattern, which you can download and print.
This is an easy pattern, with only 4 pattern pieces. As this was my first foray into designing a stuffy pattern of any kind, I thought simple would be best. My aim was to make a bunny that was easy enough for beginners (the adventurous sort), but also quite realistic. I’m generally not a fan of unrealistic depictions of, well, anything. Don’t get me wrong, I don’t judge stuffies much. But if I was going to make my own stuffy pattern, I wanted it to be realistic. A lot of the free bunny sewing patterns out there look more like a teddy bear, which, while cute, is not very bunny-like (or bear-like, really!).
I also wanted it to have hingey legs, so that it can sit, lay down, or stand up.
For this bunny, I took my inspiration from the Peter Rabbit books by Beatrix Potter. I also looked at lots of pictures of cottontail rabbits online (my personal experience with rabbits is actually quite limited… we had lots of different animals growing up, but never rabbits). There are quite a few free bunny sewing patterns on the internet, but I feel that this one is special in its own way.
What materials can be used to make this stuffed bunny?
Stuffed toys are the perfect way to use up fabric scraps!
I love natural fibers, so I used linen fabric and wool batting for the stuffing.
For the fabric, you could use anything woven like linen or quilting cotton, cotton velvet, or even a plush fabric to give your bunny some fur.
For the fill, you could use wool batting like I did. I get mine from Custom Woolen Mills in Canada. It’s amazing and a great price. (I also used it to make my winter coat and a mattress for my daughter.)
Or you could also use cotton puffs (I think 2 bags from the pharmacy section would be plenty) or synthetic polyfill (from the craft section of a store or an old pillow). Some other great options for a natural fill are sawdust (this is what the first teddy bear, inspired by Theodore Roosevelt, was likely filled with!), dried lavender (a great idea for a bedtime stuffy as the natural lavender scent will help your child to relax) or other lightweight vegetative matter, or even some fabric scraps cut up small (this will be lumpy, which is charming in its own way). I’m sure there are lots more things you could use, too.
The facial features are embroidered on with cotton floss using two very simple embroidery stitches. But if embroidery sounds like something you don’t want to do, you could else sew on button eyes instead (or even buy bead eyes), and simply skip the nose and mouth (it will still look really cute!).
For the tail, I used some white wool yarn that I’ve had forever, since way back when I actually knitted!
Supplies and Materials
- Sewing machine
- Basic sewing supplies
- Woven fabric scraps (linen, quilting cotton, old sheets, dish towels, etc)
- Stuffing (I used wool futon batting, otherwise polyfill or cotton puffs, etc)
- Cotton embroidery floss (like DMC or Anchor) for the facial features
- Yarn for the tail
How To Sew A Stuffed Bunny
Alright so let’s get into some detailed instructions to make this little bunny!

First, prepare your fabric. Wash, dry, and iron.
Even if this stuffy won’t ever be washed, you don’t want all the manufacturing chemicals on a toy.
Prepare the free PDF pattern
Next, you will need to download the free pattern, which you can find here:
Then you can print it and cut out the pattern pieces.
On the Body piece, poke holes on the ear and leg placement marks. This is so you can mark the fabric in the next step. For the eye, I poke several holes all around it. Cut slits along the nose, mouth, and tail placement marks.
Mark and cut your fabric
Body piece
Next, lay two pieces of your main fabric right sides together and lay the Body piece on top. Keep in mind, there is no seam allowance included in the pattern, so leave enough room to accommodate the seam allowance. This is so that you can trace around the pattern and then sew along your traced line. Otherwise, you will lose the small details and end up with too blobby and inconsistent of a bunny.
First, trace all around the body of the bunny, marking where to leave the opening. This will be on the wrong side. A pencil works great here, or you can use chalk or a white soap bar for darker fabrics. Just don’t use anything that will seep, like a marker. Once you’ve got it traced, cut through both layers of fabric, leaving a 1/2-inch seam allowance. Also cut 4-5 notches all around, which will help you with lining the pieces back up later, once the legs and ears are attached.

Then separate the pieces, so that you are looking at the right sides. Next, take your paper pattern piece and place it over the fabric, and mark all the placement marks (eye, nose, mouth, ear, front leg, hind leg, tail). Do this on both pieces. I found it helpful to darken my marks once the pattern was removed. Then, set your body pieces aside until later.

Legs and ear pieces
Now again lay some of your main fabric right sides together. Trace 2 sets of front legs and hind legs. For these smaller pieces, you can trace them and leave them uncut until after sewing. Leave enough room for a 1/4-inch seam allowance. Place pins as you normally would.

For the ears, lay your main fabric and contrast fabric right sides together and trace 2 sets of ears. Again, you can cut now or after sewing.

Sew the legs and ears
Stitch all your little pieces together at the sewing machine. Make sure to leave your openings! You can zig-zag the raw edges if you’d like. I didn’t, but it would make for a more resilient rabbit.
Trim the tips of the ears as well as the bottom corners.
Clip the inner curves on the hind legs.

Then turn the pieces right side out.
Iron the ears nice and flat. Then fold the bottoms in by 1/4 inch and iron. This opening doesn’t need to be sewn closed.

Now you can get to stuffing the legs! Don’t pack too firmly. If the seams look a little funny, try pushing the stuffing up into those parts and sort of rubbing the seam from the inside until it looks better.

Now hand stitch the openings closed, using a slip stitch with a doubled thread. You can check out this video for how to do a slip stitch, or refer to the picture below.

Sew the legs and ears to the body of the stuffed bunny
Now to attach the legs and ears to the body. You can hand-baste in place first, but I find it works fine to just place the piece over the placement mark on the right side of the body and carefully slide it under the presser foot. I also place a little wad of stuffing underneath (on the wrong side of the body, just to give the stitches a little more to grab).
You will want the feed dogs on your sewing machine down, or to use your shortest stitch length so that the fabric barely gets moved as you sew. If you have a buttonhole setting, that will work great. If not, just use your zig-zag stitch.
For the ears, I used a slightly wide zig-zag stitch of 4.5 (a tiny bit bigger than 1/8 inch). I sewed my ears so that the zig-zag ran along the length of the ears. Make about 10 stitches and end with a reinforcement stitch (AKA stitch in place. The buttonhole setting does this, but otherwise switch to a straight stitch and stitch in place 3-4 times to secure it.)


For the legs, I used a zig-zag width of 3.5 (a little less than 1/8 inch). This makes a little hinge so that the legs can twist easily. If you want them a bit stiffer, just make them the stitch the same width as the ears. Again, take about 10 stitches and end with a reinforcement stitch.

Sew the body of the bunny together
Now you can pin your bunny right sides together. Use the notches you made earlier to help you get everything lined up. Use lots of pins. This part is a little awkward, you just need to get all the ears and legs tucked in there and not in the way of the pins.
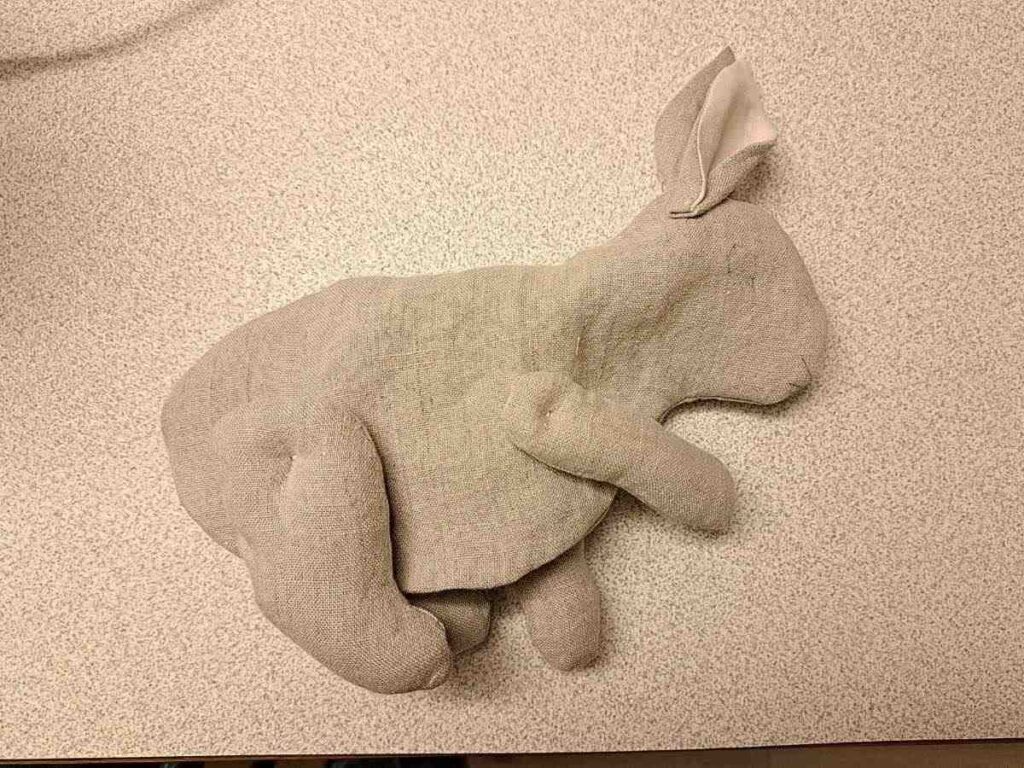
Now to sew! Take your funny-looking blob back to your sewing machine and follow your stitching line. You can move the limbs out of the way of where you’re stitching as you go. Take extra care around the ears so that you don’t sew them into the seam!
Once you’re all done, clip the inner curves at the top and bottom of the neck.

Now to turn your bunny right side out. Aww, isn’t it already looking cute?!
Make the pom pom bunny tail
Now there is one more step before you can start stuffing, and that is to make the pom pom tail.
Wrap your yarn around 3 fingers so that it looks like this. It should be about 1.5 inches wide and about 1/2 inch on each side of your fingers.

Then take it off your fingers and secure using some very strong string and a sheet bend knot. I found this YouTube video to help me with the knot.
Make sure to leave 2 long tails of your strong string, to attach the pom pom to the stuffed bunny.

Then cut the loops and do a quick trim on your pom pom.
Thread both the tails into the inside of the bunny and tie a secure knot from the inside.

Stuff the bunny
Now you can finally stuff your bunny! My toddlers loved helping with this step. I like to take my time while doing the head, to make sure that the seams look good. I use my fingers to try to get the seam allowance laying to the same side as I put the stuffing in. Otherwise, the seam can look uneven and bumpy. Just like with the legs, if the seams look funny, try to rub them with the stuffing, kind of pressing it up into the seams.
Once the body of the bunny is stuffed, you can close up the opening, again using a slip stitch with a doubled thread.

Embroider the facial features
Now just one more step and you’re all done! Embroidering the eyes, nose, and mouth. Now don’t worry, I am no expert when it comes to embroidery. There are just 2 very simple stitches to do here and it only takes a few minutes to do.
I used the full thickness of my embroidery floss (6 strands). I used a length of about 3 1/2 half feet and that was enough for the whole face.
Embroider the eyes with a satin stitch
So first start with the eye. Insert your needle on the opposite side than you’re going to start on, passing through to the other side and coming out at the top of the eye. Pull the thread through, leaving a 1-inch tail sticking out the other side. Use your needle to grab a tiny bit of fabric inside the eye area and make a loop, then wrap the needle through the loop twice and pull through carefully to make a knot at the base of the fabric. Now you can start working your satin stitch. You’re basically just going in and out, wrapping around the fabric. Always start your stitch just underneath the start of your last stitch, and always just outside of your drawn line.

Just in case that’s not clear, here’s a video on the satin stitch:
Once you finish one eye, insert the needle and pass it to the other eye and start working your satin stitch again.
Embroider the nose and mouth with a backstitch
For the nose, bring your thread from the eye, coming out between the seam and the end of the nose (picture below the video). You’re going to use a back stitch, which is kind of anti-intuitive, but also very simple once you’ve got it. Because it’s a little weird, I’ll share this video with you and some of my pictures.
Finish up the nose by making a knot in the same way you did when you started the eye. Then insert the needle and pull it back out a little ways away. Pull your ends that are sticking out taut and trim them. They will pull back into the bunny all be themselves.

All done!
And you’re done your adorable little bunny! Good job!

I’d love to know if you sew one of these little stuffed bunnies up! Would you like to see more free sewing patterns like this one on this blog? Let me know in the comments below if you would 🙂
And if you’re looking for more projects to sew for kids, you can check out this free hair bow pattern, or this shirred sundress tutorial.

Leave a Reply